因下面两个趋势的消失,通用计算芯片的发展已趋于平缓,专用计算芯片开始进入大众视野:
在部署模型推理时,这每一层的运算操作都是由GPU完成的,具体是GPU通过启动不同的CUDA(Compute unified device architecture)核心来完成计算的,CUDA核心计算张量的速度是很快的,但是往往大量的时间是浪费在CUDA核心的启动和对每一层输入/输出张量的读写操作上面,这造成了内存带宽的瓶颈和GPU资源的浪费。
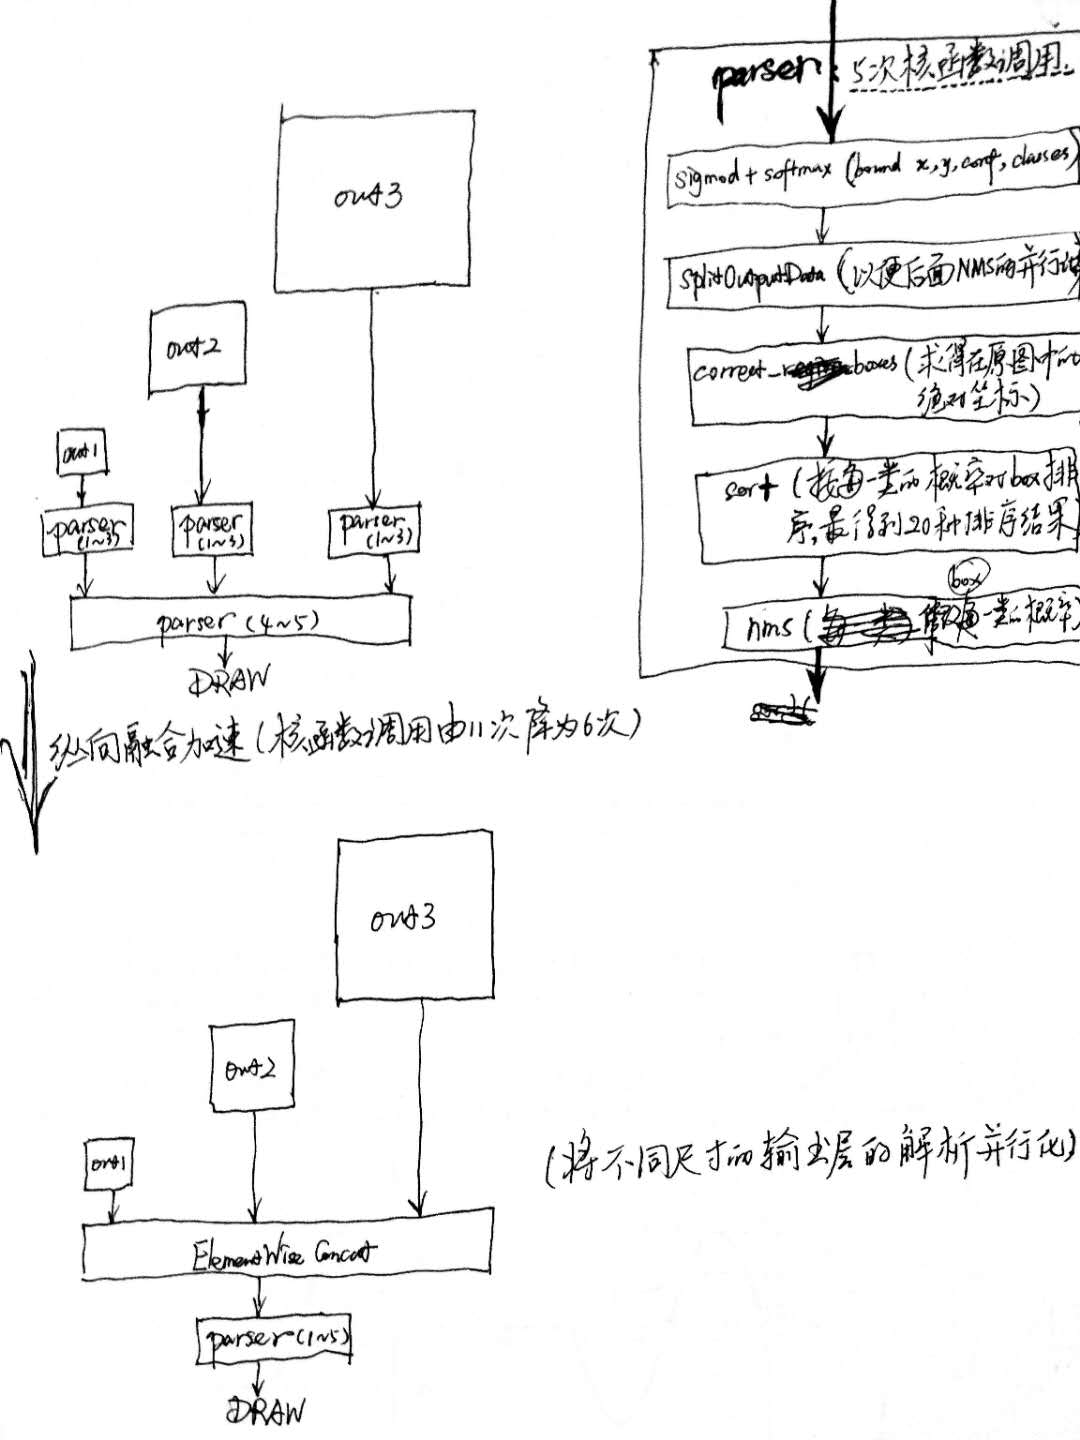
故可通过合并计算图来优化推理:横向合并可以把卷积、偏置和激活层合并成一层CBR(conv+bias+relu)结构,只占用一个CUDA核心;纵向合并可以把结构相同,但是权值不同的层合并成一个更宽的层(多层输出的结构可借用该方法做输出层的解析加速,如下图所示),也只占用一个CUDA核心。以YOLOv3为例:

build: Import and optimize trained models to generate inference engines.
// 创建一个builder
IBuilder* builder = createInferBuilder(logger_);
// 创建一个network对象,不过这时network对象只是一个空架子
INetworkDefinition* network = builder->createNetwork();
ICaffeParser *parser = createCaffeParser();
// 这一步之后network对象里面的参数才被填充,才具有实际的意义
auto blobNameToTensor = parser->parse(deployFile,                                                                                 modelFile,
                                      *network,
                                      DataType::kFLOAT);
for (auto& s : vOutputBlobNames_)
  network->markOutput(*blobNameToTensor->find(s.c_str()));
// 设置batchsize和工作空间,然后创建inference engine
builder->setMaxBatchSize(maxBatchSize_);
builder->setMaxWorkspaceSize(16 << 20);
// 调用buildCudaEngine时才会进行前述的层间融合或精度校准优化方式
ICudaEngine* pEngine_ = builder->buildCudaEngine(*network);
network->destroy(); builder->destroy();解析caffe模型之后,必须要指定输出tensor,设置batchsize和工作空间。设置batchsize就跟使用caffe测试是一样的,设置工作空间是进行前述层间融合和张量融合的必要措施。层间融合和张量融合的过程是在调用builder->buildCudaEngine时才进行的。
deploy: Generate runtime inference engine for inference.
// 创建上下文环境 context,用于启动kernel
IExecutionContext *context = pEngine_->createExecutionContext();
//获取输入,输出tensor索引
int inputIndex = pEngine_->getBindingIndex(inputLayerName),
int outputIndex = pEngine_->getBindingIndex(outLayerName);
// Allocate GPU memory for Input / Output data
void* buffers = malloc(pEngine_->getNbBindings() * sizeof(void*));
cudaMalloc(&buffers[inputIndex], batchSize * size_of_single_input);
cudaMalloc(&buffers[outputIndex], batchSize * size_of_single_output);
//使用cuda 流来管理并行计算
cudaStream_t stream;
cudaStreamCreate(&stream);
//从内存到显存,input是读入内存中的数据;buffers[inputIndex]是显存上的存储区域,用于存放输入数据
cudaMemcpyAsync(buffers[inputIndex],
                input,
                batchSize * size_of_single_input,
                cudaMemcpyHostToDevice,
                stream);
//启动cuda核计算
context.enqueue(batchSize, buffers, stream, nullptr);
//从显存到内存,buffers[outputIndex]是显存中的存储区,存放模型输出;output是内存中的数据
cudaMemcpyAsync(output,
                buffers[outputIndex],
                batchSize * size_of_single_output,
                cudaMemcpyDeviceToHost,
                stream));
//如果使用了多个cuda流,需要同步
cudaStreamSynchronize(stream);
cudaStreamDestroy(stream);
cudaFree(buffers[inputIndex]);
cudaFree(buffers[outputIndex]);
deploy阶段主要完成推理过程,Kernel Auto-Tuning 和 Dynamic Tensor Memory 应该是在这里完成的。将上面一个步骤中的plan文件首先反序列化,并创建一个 runtime engine,然后就可以输入数据,然后输出分类向量结果或检测结果。